How to Add Tags to Your Posts In Gridsome
 Photo by Jo Szczepanska on Unsplash
This is part seven of a series on building a file-based blog from scratch with Gridsome. Find the full series here.
The concept we need for categories and tags in Gridsome is taxonomy pages.
Every node in Gridsome's GraphQL Schema has a belongsTo field that shows which other nodes are referencing it.
To add tags to our blog we first need to add tags to our frontmatter:
---
slug: "first-post"
date: "2020-06-05"
title: "Hipster Ipsum"
tags: ["backend", "hipster"]
---

## This should be a heading 2

I'm baby chartreuse knausgaard gastropub deep v mlkshk pickled crucifix chicharrones meggings.
...
We should add dummy tags to all our posts so we can try our tags out.
We also need to edit the module.exports in our gridsome.config.js:
module.exports = {
  siteName: 'Gridsome',
  plugins: [
    {
      use: '@gridsome/source-filesystem',
      options: {
        typeName: 'BlogPost',
        path: './content/blog/**/*.md',
        remark: {
          plugins: [
            [ 'gridsome-plugin-remark-shiki', { theme: 'nord', skipInline: true } ]
          ]
        },
        // add this refs section so the BlogPosts are linked with the generated Tags pages
        refs: {
          tags: {
            typeName: 'Tag',
            create: true,
          },
        },
      }
    }
  ],
  templates: {
    BlogPost: '/blog/:slug',
    // add the tags template
    Tag: '/tag/:id',
  },
  css: {
      loaderOptions: {
          postcss: {
              plugins: postcssPlugins,
          },
      },
  },
}
Next up, we need a Gridsome template for our tags. Create the file src/templates/Tag.vue:
<template>
  <Layout>
    <h1 class="text-xl font-semibold mb-5">{{$page.tag.title}}</h1>

    <ul class="list-outside list-disc">
      <li v-for="post in $page.tag.belongsTo.edges" :key="post.node.id" class="mt-3">
        <g-link :to="post.node.path">{{ post.node.title }} – {{post.node.date}}</g-link>
      </li>
    </ul>
  </Layout>
</template>

<page-query>
query Tag ($id: ID!) {
  tag: tag (id: $id) {
    title
    belongsTo {
      totalCount
      edges {
        node {
          ...on BlogPost {
            title
            date (format: "MMMM D, Y")
            path
          }
        }
      }
    }
  }
}
</page-query>

<script>
export default {
  metaInfo () {
    return {
      title: 'Tag: ' + this.$page.tag.title,
    }
  },
}
</script>
The belongsTo section in the page-query allows us to access the blog posts that use this tag.
Finally, we need to load and add the tags to our BlogPost.vue template.
We add the tags to our page-query:
<page-query>
query Post ($path: String!) {
  post: blogPost (path: $path) {
    title
    date (format: "MMMM D, Y")
    content
    tags {
      title
      path
    }
  }
}
</page-query>
And then we add the tags to our template and style them a little:
<template>
  <Layout>
    <h1 class="text-3xl font-semibold mb-2">{{ $page.post.title }}</h1>
    <p class="font-light mb-4 text-gray-700">{{ $page.post.date }}</p>
    <div class="flex flex-wrap mb-4 text-sm">
      <g-link
        :to="tag.path"
        v-for="tag in $page.post.tags"
        :key="tag.id"
        class="bg-gray-300 rounded-full px-2 py-1 mr-4 mb-4 text-gray-700 hover:text-gray-300 hover:bg-gray-700">
        {{ tag.title }}
      </g-link>
    </div>
    <div class="mb-16 markdown" v-html="$page.post.content" />
  </Layout>
</template>
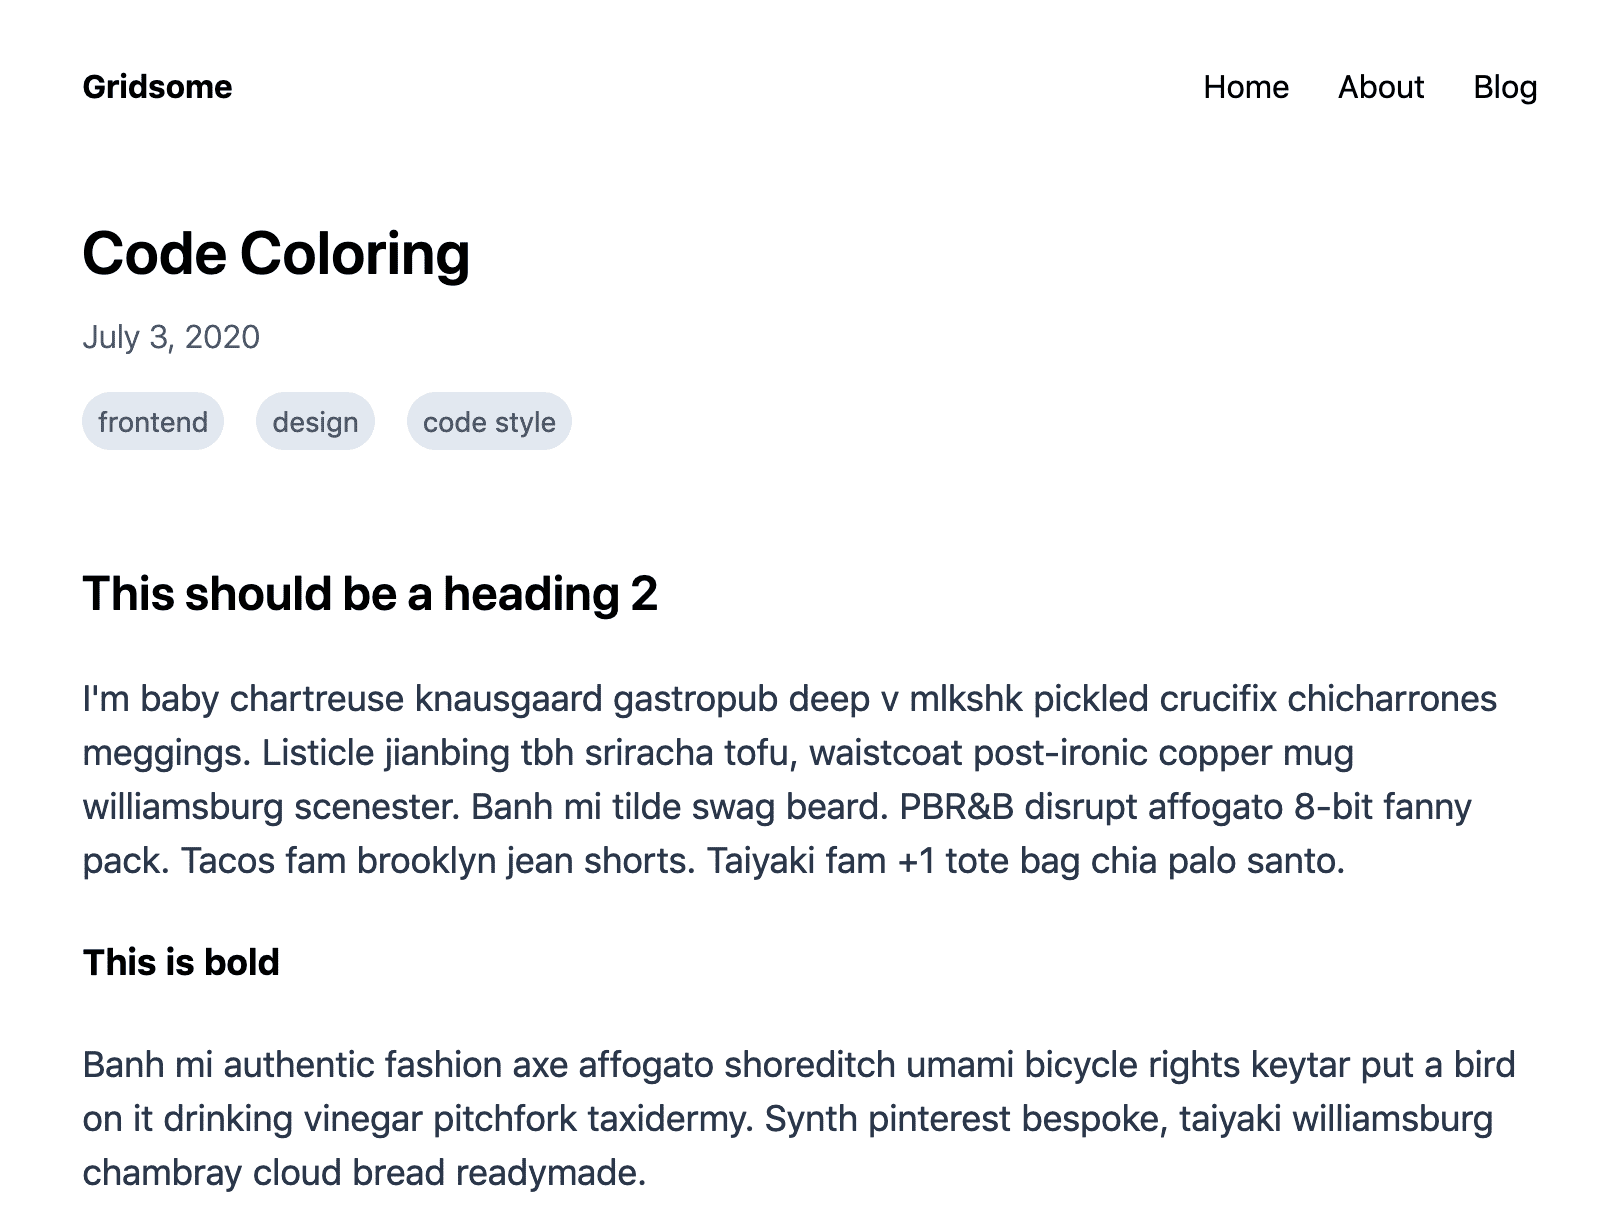
And with these changes, we can fire up our blog with yarn develop and see one of the blog posts with tags:

And when we click on one tag, we get an overview page:

If you want to add categories to your Gridsome blog, you can do something similar to what you just learned about adding tags.
Next part: set up ESLint and code auto-formatting with Gridsome
That’s it for this post on how to add tags to our Gridsome blog. In the next part of this series, we'll set up ESLint and code auto-formatting with Gridsome.